
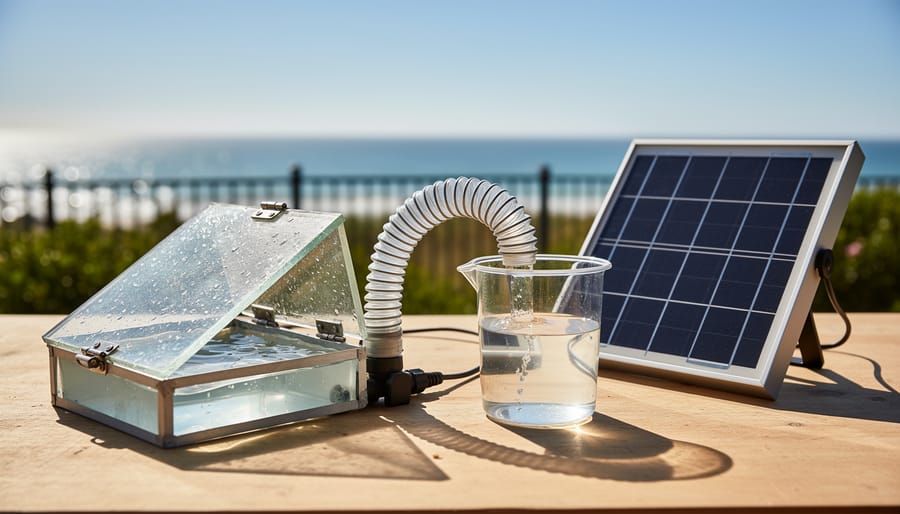
Building a solar-powered water desalination system transforms saltwater into drinkable freshwater using only sunlight, combining a solar still or photovoltaic-powered reverse osmosis unit with basic materials you can assemble in a weekend. For beginners, a passive solar still offers the simplest entry point, requiring minimal technical skill and an investment of roughly $50 to $200 depending on scale, while more advanced builders can construct active systems capable of producing several liters of purified water daily.
The beauty of solar desalination explained lies in its elegant simplicity: solar energy heats saline water, causing evaporation that leaves salt and contaminants behind, then condenses the pure vapor back into liquid form. This process mimics Earth’s natural water cycle, scaled down to a manageable device you can build on your workbench or in your backyard.
Why does this matter now? By 2026, water scarcity affects over two billion people globally, and conventional desalination plants consume enormous amounts of fossil fuel energy. Dr. Sarah Chen, a researcher at MIT’s Water Innovation Lab, notes that “decentralized solar desalination represents one of the most promising pathways for coastal and island communities to achieve water independence without grid infrastructure.” Your DIY project connects directly to this global movement toward sustainable water security.
Whether you’re a student exploring renewable energy applications, an educator demonstrating scientific principles, or a community organizer seeking practical solutions for water-stressed regions, this guide walks you through every stage: selecting appropriate materials, understanding safety protocols, assembling your system step by step, and verifying that your purified water meets safety standards. The result is both a functional tool and a hands-on education in sustainable technology.
Understanding Solar Desalination Technology
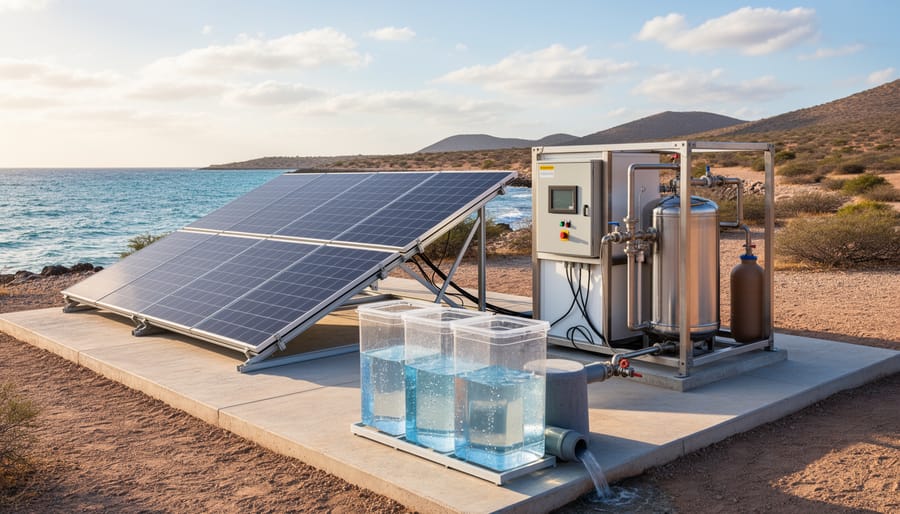
Solar-powered water desalination harnesses the sun’s energy to remove salt and impurities from seawater or brackish water, producing clean water through natural evaporation and condensation processes. The technology operates on the same principle that drives the Earth’s water cycle: solar energy heats saline water, causing it to evaporate and leave dissolved salts behind. As water vapor rises and cools, it condenses on a collection surface as purified water, which then drips into a separate container.
Two primary approaches power these systems. Solar thermal desalination uses direct heat from the sun to warm water in an enclosed chamber, typically a transparent-topped box that acts like a greenhouse. The heated water evaporates, condenses on the cooler underside of the glass or plastic cover, and runs down into collection channels. Alternatively, photovoltaic-powered systems use solar panels to generate electricity that runs mechanical desalination equipment like reverse osmosis pumps, though thermal methods remain simpler for small-scale projects.
The effectiveness of solar desalination in coastal and arid regions stems from the abundance of its two essential inputs: sunlight and saline water. Coastal communities can tap into inexhaustible seawater supplies, while inland areas often have access to brackish groundwater unsuitable for drinking. Desert regions, despite their water scarcity, receive intense solar radiation year-round, making them ideal candidates for solar thermal systems that convert this harsh environment into an asset rather than a liability.
Dr. Sharon Makena, a water resources researcher at the Desert Research Institute, emphasizes the technology’s transformative potential: “Solar desalination isn’t just about producing water, it’s about energy independence and climate resilience. Communities that once relied on expensive diesel generators or distant water deliveries can now generate their own freshwater indefinitely, using only local sunlight and seawater.”
The scalability of solar desalination ranges from portable survival stills producing a few liters daily to larger community installations generating hundreds of gallons. This flexibility makes it practical for individual households, schools, small farms, and disaster relief operations where conventional infrastructure is absent or unreliable.
Tools and Materials You’ll Need
Building an effective solar-powered water desalination project requires careful selection of materials that work together as a system. Each component plays a specific role in capturing solar energy, evaporating saline water, condensing pure water vapor, and safely storing the desalinated output.
The solar collection system forms the heart of your project. You’ll need either a solar thermal collector (such as a flat black metal sheet or commercially available solar water heater panel) or photovoltaic solar panels if you’re powering an active heating element. The thermal approach is simpler for beginners and directly converts sunlight to heat without electrical intermediaries. A reflective backing material, like aluminum foil or mylar sheets, amplifies solar capture by directing more light toward the evaporation surface.
For the desalination chamber itself, a clear glass or polycarbonate cover is essential because it allows sunlight penetration while trapping heat inside through the greenhouse effect. The evaporation basin should be a shallow, dark-colored, waterproof container made from food-grade plastic, stainless steel, or glass. Dark surfaces absorb more solar radiation, accelerating the heating of saline water. The chamber needs a sloped condensation surface, typically the angled glass cover, where water vapor cools and forms droplets that gravity pulls toward collection channels.
Here’s what you’ll need organized by function:
- Solar collection: thermal collector panel or PV panels, reflective backing material, mounting brackets
- Desalination chamber: clear glass or polycarbonate sheet, dark shallow basin, waterproof sealant or caulking, insulation material for sides and bottom
- Water collection and storage: food-grade tubing or guttering, collection trough along the glass edge, clean water storage container with lid
- Construction tools: drill, screws, silicone adhesive, measuring tape, level, safety glasses, work gloves
The collection system channels condensed droplets away from the chamber. Small diameter food-grade tubing works well for this purpose, connected to a sealed storage container that prevents recontamination. Choose containers made from materials that won’t leach chemicals into your purified water.
Insulation for the chamber’s base and sides prevents heat loss to the ground and surrounding air, significantly improving efficiency. Rigid foam board insulation is inexpensive and effective. Waterproof sealant ensures no saline water escapes the evaporation chamber or contaminates the fresh water collection pathway. Quality matters here because leaks undermine the entire desalination process.
Safety Precautions and Site Considerations
Before you begin construction, understanding the hazards and environmental requirements will protect both you and your system’s long-term performance. This section covers essential safety measures and the physical conditions your solar-powered water desalination project needs to function effectively.
Handling Glass and Construction Materials
Most solar desalination systems use glass as a condensation surface because it allows sunlight penetration while providing a cool surface for water vapor to condense. Glass panels are fragile and sharp when broken. Wear cut-resistant gloves during assembly and secure all edges with silicone sealant or protective trim. If you’re working with tempered glass, store it flat on a padded surface and never lean it at angles where wind could knock it over.
When cutting or drilling acrylic alternatives, work in a well-ventilated area. Plastic dust and fumes from sealants contain volatile organic compounds that shouldn’t be inhaled for extended periods.
Saline Water Handling
Concentrated brine left after desalination is corrosive and environmentally harmful. Never dump it directly onto soil where it can kill vegetation or seep into groundwater. Dispose of brine through proper drainage systems or dilute it significantly before discharge. Saline water can also corrode metal fasteners over time, so use stainless steel or plastic hardware throughout your build.
Site Selection Requirements
Your desalination unit needs six to eight hours of direct sunlight daily to produce meaningful water volumes. Choose a south-facing location in the Northern Hemisphere (north-facing in the Southern Hemisphere) with minimal shade from trees or structures. The site should have stable, level ground to prevent the evaporation basin from tipping.
Ventilation matters more than many builders realize. Stagnant, humid air around the system reduces condensation efficiency and promotes algae growth. Position the unit where natural breezes can circulate without creating excessive heat loss. Keep it at least three feet from walls or fences to allow airflow on all sides.
Step-by-Step Construction Process
Preparing the Desalination Chamber
The evaporation basin forms the heart of your solar-powered water desalination project, where saltwater transforms into pure vapor. A shallow, wide container works best because it maximizes surface area for evaporation while maintaining a manageable depth of 2-4 inches. Black plastic or metal containers absorb solar heat most efficiently, though clear food-grade plastic lets you monitor water levels easily.
For a small-scale system, repurpose a storage bin or large baking tray measuring at least 2 feet by 3 feet. Larger projects demand custom-built chambers using marine plywood sealed with fiberglass resin or food-safe pond liner. Whatever material you choose, it must withstand constant moisture and salt exposure without leaching chemicals into your water.
Waterproofing determines your system’s longevity. Apply multiple coats of waterproof sealant to wooden frames, letting each layer cure completely. Inspect all seams and corners twice, even tiny leaks waste precious solar energy by draining water before it evaporates. For metal containers, check for rust spots that could contaminate your output.
Size your chamber based on daily water needs. A 6-square-foot basin produces roughly 1-2 liters of fresh water per sunny day, depending on your climate. If you need more, build multiple smaller units rather than one unwieldy tank. They’re easier to position, maintain, and replace.
Paint the basin’s interior flat black to maximize heat absorption. This simple modification can boost evaporation rates by 30-40% compared to reflective surfaces, making your solar desalination system substantially more productive.
Installing the Solar Collection System
The solar collection system forms the power source for your desalination unit, converting sunlight into the thermal energy needed to evaporate saline water. Proper installation directly affects your system’s output and overall solar power efficiency.
Position your solar thermal collectors or photovoltaic panels facing true south if you’re in the Northern Hemisphere, or true north in the Southern Hemisphere. Use a compass to find magnetic south, then adjust for magnetic declination in your area, typically 10 to 20 degrees depending on location. This ensures maximum sunlight exposure throughout the day.
Set the tilt angle to match your latitude for year-round performance. If you live at 35 degrees latitude, angle your collectors at 35 degrees from horizontal. For summer-focused operation in water-scarce seasons, reduce this by 10 to 15 degrees. A simple protractor or angle finder helps achieve precision.
Secure the mounting frame to a stable base using weather-resistant bolts and brackets. The structure must withstand wind loads without shifting, as even minor movements reduce collection efficiency. For rooftop installations, ensure you’re fastening into structural beams, not just shingles or surface materials.
Connect thermal collectors to your evaporation chamber using insulated tubing to minimize heat loss during transfer. If using photovoltaic panels to power pumps or heating elements, verify all electrical connections are waterproof and rated for outdoor use. Leave adequate clearance around panels for air circulation, which prevents overheating and maintains optimal energy conversion rates.
Setting Up the Condensation and Collection Mechanism
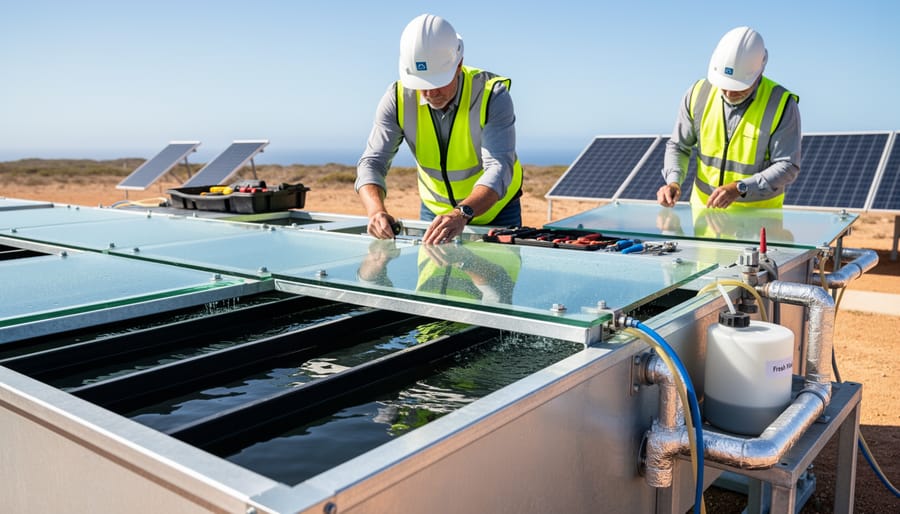
With the evaporation chamber and solar collector in place, you now need to create an efficient pathway for purified water vapor to condense and flow into your collection container. This condensation mechanism is where the actual desalination occurs, the vapor rises, cools, and becomes freshwater while leaving salt behind.
Start by selecting your condensation surface. A sheet of clear glass or rigid plastic works well, but it must be angled correctly. Position this surface at a 15 to 30-degree slope above the saline water in your evaporation basin. The angle serves a critical purpose: water droplets form on the cooler underside of this surface, then gravity pulls them downward along the slope rather than dripping back into the saltwater below.
Seal the edges of your condensation surface against the chamber walls using silicone caulk or weatherstripping. You want vapor to contact the cool surface, not escape through gaps. Leave one lower edge partially open, this is where condensed droplets will exit.
Next, create a collection channel at the lowest point of your angled surface. A simple V-shaped aluminum or plastic trough positioned just below the condensation surface catches the droplets as they roll down. This trough funnels water toward one end, where you’ll attach food-grade plastic tubing.
Connect a half-inch diameter tube to the collection trough, ensuring a tight, leak-free connection with appropriate fittings or waterproof sealant. The tube should slope continuously downward toward your clean water storage container, avoid any uphill sections where water could pool or flow backward.
Place your storage container lower than the collection point to maintain gravity flow. Use a container made from food-grade plastic or glass, and cover it to prevent contamination. For added efficiency, paint the outside of your condensation surface white or cover it with reflective material to increase the temperature difference between the hot vapor and the cooling surface above.
Testing and Verifying Water Quality
Once your solar desalination system is operational, testing and verification are essential to ensure it produces safe, usable water. Start by running the system for a full day under normal sunlight conditions and measuring the total volume of distilled water collected. Compare this output to your basin’s surface area and the day’s solar radiation to calculate efficiency, a simple passive system typically converts 3-5 liters per square meter of evaporation area on a sunny day, while active systems with circulation pumps can double that figure.
For water quality assessment, focus on these key performance indicators:
- Daily water output: Track volume in liters to identify production trends and optimal operating conditions
- Salinity reduction percentage: Measure input versus output salinity to verify desalination effectiveness
- Temperature efficiency: Monitor evaporation chamber temperature, aiming for 60-80°C in direct sunlight
- Water clarity: Visually inspect for cloudiness, sediment, or floating particles that indicate contamination
The most accessible salinity test uses a handheld refractometer or TDS (total dissolved solids) meter, available for $15, $30 online. Properly functioning desalination should reduce salinity from seawater levels (35,000 ppm) to below 500 ppm, making it suitable for irrigation or further purification. For drinking water applications, you’ll need additional filtration and testing for bacterial contamination using test strips or laboratory analysis, as distillation alone doesn’t guarantee microbiological safety.
If production is lower than expected, check for leaks in the condensation chamber, inadequate sealing around the collection surface, or poor solar exposure due to shading. Contamination usually stems from splash-over from the saline basin into the collection trough, lowering the water level or adjusting the condensation surface angle typically fixes this. Advanced projects can integrate AI for optimization of panel angles and pump timing, though manual adjustments work well for small-scale systems. Run tests over several days to account for weather variation before making structural modifications.
Optimization and Next Steps

Once you’ve verified your desalination unit produces clean water, several modifications can boost performance and output. Start by adding reflective surfaces around your evaporation chamber. Aluminium foil or reflective panels positioned at 45-degree angles redirect sunlight that would otherwise miss the collection area, increasing thermal energy capture by up to 30%. Insulating the sides and bottom of your evaporation basin with foam board or fibreglass batting prevents heat loss, maintaining higher water temperatures for faster evaporation even on partly cloudy days.
To scale up production, connect multiple desalination chambers in parallel, feeding them from a shared saline water reservoir and collecting output into a single storage tank. A system with three chambers roughly triples your daily yield. For households or community gardens requiring consistent supply, integrate a small battery bank to store excess solar energy during peak hours, powering a circulation pump that continuously feeds saline water through your chambers and maintains optimal water levels.
Regular maintenance ensures longevity. Clean condensation surfaces weekly to prevent salt residue buildup that reduces efficiency. Inspect seals and tubing monthly for leaks or degradation from salt exposure. Replace any corroded metal fittings with plastic or stainless steel alternatives.
Your project connects to broader advancements in sustainable water solutions. Universities worldwide are developing large-scale solar desalination facilities that demonstrate low-carbon energy applications for water security. Understanding how low-carbon sources work in these research systems can inspire further improvements to your own design. As you refine your desalination project, you’re participating in a global movement toward energy-efficient water purification that addresses climate challenges and resource scarcity simultaneously.
Frequently Asked Questions
How much water can a DIY solar-powered water desalination project produce daily?
A basic 1-square-meter solar still typically produces 2-4 liters of freshwater per day under ideal conditions, while larger systems with multiple collection panels can yield 10-20 liters. Actual output depends heavily on sunlight intensity, ambient temperature, and the salinity of your source water.
What does building a solar desalination system cost?
Materials for a small-scale project range from $50-200 for basic passive solar stills using glass and simple containers, while more sophisticated systems with PV panels and pumps can run $500-1,500. The price varies widely based on whether you repurpose materials or purchase commercial components.
Can this system produce safe drinking water or just irrigation water?
Properly constructed solar desalination removes salt and many contaminants through distillation, making the water suitable for drinking if your source is seawater or brackish groundwater. However, you should test the output and, if the source contains industrial pollutants or heavy metals, add a carbon filter or use the water for irrigation instead.
How often does a solar-powered water desalination project require maintenance?
Passive systems need minimal upkeep, clean the glass or transparent cover weekly to maintain light transmission and flush accumulated salt from the evaporation basin every few weeks. Systems with moving parts or pumps require quarterly checks of seals, tubing, and electrical connections.
What is the expected lifespan of the components?
Glass panels and metal frames can last 10-20 years with proper care, while rubber seals and tubing typically need replacement every 2-5 years. Solar panels maintain 80% efficiency for 20-25 years, making them the longest-lasting electrical component if you incorporate photovoltaic elements.
Beyond these common questions, remember that performance improves as you gain experience with your specific setup. Many builders start with a single small-scale unit to understand the variables affecting their local conditions, temperature swings, seasonal sunlight changes, and water source characteristics, before expanding capacity. The modular nature of solar desalination means you can troubleshoot and refine one unit without disrupting your entire system, making it forgiving for first-time builders who learn through iteration rather than getting everything perfect initially.
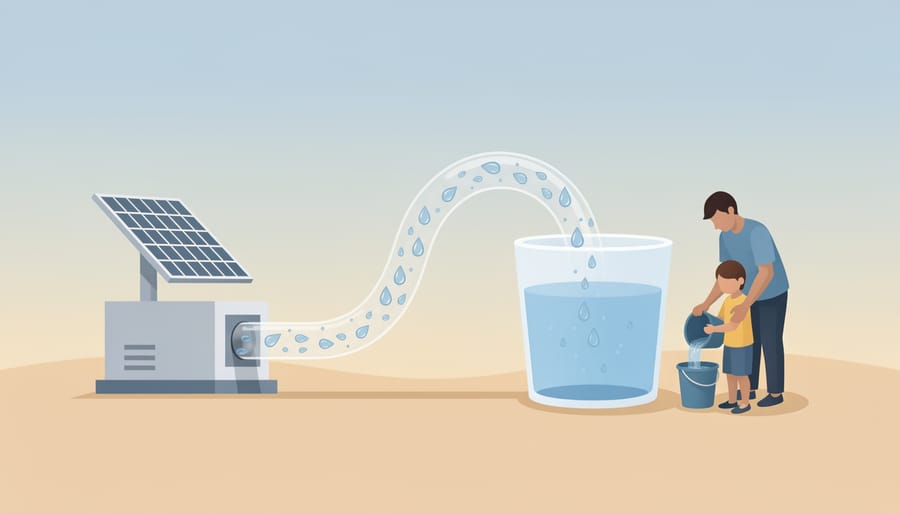
Building your own solar-powered water desalination project demonstrates that clean water solutions don’t require massive infrastructure or industrial budgets. From small backyard prototypes producing a few liters per day to community-scale systems serving entire villages, this technology proves viable across contexts. In regions facing chronic water scarcity, whether coastal communities with abundant seawater or inland areas with brackish groundwater, solar desalination offers a path forward that sidesteps reliance on expensive grid power or fossil fuels.
What makes this approach particularly valuable is its scalability and adaptability. Your desktop model can validate the same principles that researchers are refining in university labs and pilot programs worldwide. Teams at institutions from MIT to the Indian Institute of Technology continue advancing thermal efficiency, material durability, and output capacity, pushing solar desalination toward broader adoption.
The system you’ve constructed represents more than a science project. It’s a working example of how renewable energy can address one of humanity’s most pressing challenges. As climate change intensifies water stress and conventional sources become strained, distributed solar desalination, built and maintained locally, offers resilient, sustainable access to clean water. Your prototype joins a growing movement proving that innovation in water purification doesn’t always require waiting for top-down solutions.